
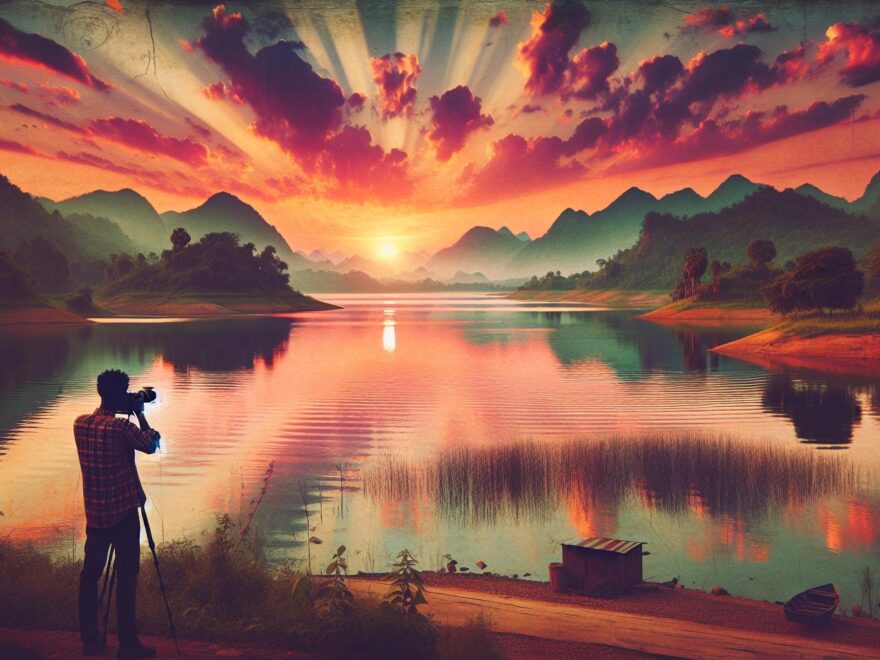
We’re absolutely thrilled to dive into the breathtaking world of landscape photography! There’s something magical about capturing nature’s most stunning views through our camera lens. From majestic mountain ranges to serene lakeside sunsets the possibilities are endless when it comes to creating unforgettable landscape images.
As photography enthusiasts we’ve discovered that taking remarkable landscape photos requires more than just pointing and shooting. It’s an art form that combines technical skills creative vision and perfect timing. We’ll show you how to transform ordinary outdoor scenes into extraordinary visual masterpieces that’ll make viewers feel like they’re standing right there with you in nature’s grand theater.
Understanding the Fundamentals of Landscape Photography
Let’s dive into the essential elements that’ll help you capture stunning landscape photos with confidence and creativity.
Essential Camera Equipment for Landscapes
- DSLR or Mirrorless Camera: We recommend investing in a camera with manual controls full-frame sensors for superior image quality in landscape photos
- Wide-Angle Lens: A 14-35mm lens helps capture expansive scenes mountain ranges coastal views rolling hills
- Sturdy Tripod: We can’t stress enough how crucial a stable tripod is for sharp landscape photos especially in low light conditions
- Polarizing Filter: This essential tool reduces glare enhances colors darkens skies makes clouds pop in your shots
- Neutral Density Filters: These filters help balance exposure between bright skies dark foregrounds creating more balanced landscape photos
- Remote Shutter Release: We use this to minimize camera shake during long exposures waterfall shots sunset scenes
- Camera Bag: A weather-resistant bag protects gear during outdoor shoots hiking adventures location changes
Mastering Basic Camera Settings
- Aperture Priority: We typically shoot landscapes at f/8 to f/16 to achieve maximum depth of field
- ISO Settings: Keep ISO low (100-400) to minimize noise maintain image quality in landscape photos
- Manual Focus: We often use manual focus with live view to ensure front-to-back sharpness
- RAW Format: Always shoot in RAW to preserve maximum detail flexibility in post-processing
- Exposure Bracketing: Take multiple shots at different exposures to capture both highlights shadows
- White Balance: Use daylight or cloudy presets for natural color reproduction adjust based on conditions
- Mirror Lock-up: Enable this feature when using slow shutter speeds to reduce internal camera vibration
Choosing the Perfect Time for Landscape Photos

Golden Hour and Blue Hour Photography
The golden hour transforms landscape photos into magical masterpieces with warm golden light casting long shadows during the first and last hour of sunlight. Photographers cherish this time for its soft diffused illumination that adds depth dimension and character to landscapes. During golden hour we’ll find:
- Warm orange-yellow tints that create a cozy inviting atmosphere
- Soft directional light that reveals textures without harsh shadows
- Extended shadows that add drama and leading lines
- Perfect conditions for silhouettes against colorful skies
- Less contrast making it easier to capture balanced exposures
The blue hour occurs just before sunrise and after sunset painting landscapes in cool ethereal tones. This creates:
- Serene mystical moods with deep blue atmospheric lighting
- Smooth transitions between light and shadow
- Dreamy effects perfect for water reflections
- Enhanced artificial lighting from cities or structures
- Unique opportunities for long exposure shots
Weather Conditions That Enhance Landscapes
Dynamic weather patterns create dramatic opportunities for stunning landscape photos. Here’s what different conditions offer:
- Stormy skies provide moody backgrounds with dramatic cloud formations
- Morning fog adds mystery while softening harsh elements
- Fresh snow creates clean minimalist compositions
- Light rain produces rainbow opportunities and reflective surfaces
- Overcast days offer even lighting for forest and waterfall shots
- Partial clouds add interest and scale to mountain scenes
- Post-storm conditions present dramatic light rays and clearing skies
- Early frost highlights delicate natural patterns
Each weather scenario demands different camera settings but rewards us with unique perspectives that transform ordinary scenes into extraordinary landscape photos.
Composing Stunning Landscape Photos

Let’s explore essential composition techniques that’ll transform your landscape photos from ordinary snapshots into breathtaking works of art.
Using the Rule of Thirds
Divide your frame into a 3×3 grid to create powerful landscape photos that draw viewers in. Place key elements like mountains horizons or trees along these gridlines or at their intersection points. Position the horizon line along either the upper or lower third rather than splitting the image in half. This creates a more dynamic composition by emphasizing either the dramatic sky or the interesting foreground.
Leading Lines and Natural Frames
Incorporate natural elements that guide viewers’ eyes through your landscape photos. Use winding rivers trails fences or rock formations as leading lines that draw attention to your main subject. Look for natural frames like overhanging branches archways or rock formations to add depth and context. Position these elements starting from the corners or edges of your frame leading toward your focal point for maximum impact.
Creating Depth in Your Images
Build a strong sense of dimension in your landscape photos by including distinct foreground middle-ground and background elements. Place interesting rocks flowers or fallen logs in the foreground to create a compelling entry point. Use middle-ground elements like trees lakes or hills to bridge the scene. Ensure your background features dramatic elements like mountains or clouds that complete the composition. Maximize depth by using a small aperture (f/11-f/16) to keep everything sharp from front to back.
Mastering Natural Light in Landscape Photography

Working With Different Types of Light
Natural light transforms landscape photos throughout the day offering unique opportunities for stunning shots:
- Backlight creates dramatic silhouettes showcasing mountain ranges mountains trees against glowing skies.
- Side light reveals textures depth in rocky surfaces sandy beaches through pronounced shadows.
- Front light illuminates subjects directly perfect for capturing vibrant fall colors spring blooms.
- Diffused light on overcast days softens harsh shadows ideal for photographing waterfalls forest scenes.
- Rim light during sunrise sunset outlines subjects with golden halos creating ethereal landscape photos.
Using Filters for Enhanced Results
- Polarizing filters reduce glare on water surfaces intensify blue skies enhance color saturation.
- Neutral Density (ND) filters enable longer exposures creating silky-smooth waterfalls dreamy cloud movements.
- Graduated ND filters balance bright skies with darker foregrounds in high-contrast scenes.
- UV filters protect valuable lenses while reducing atmospheric haze in mountain landscapes.
- Color filters warm up cool tones during blue hour cool down warm tones during golden hour.
| Filter Type | Primary Benefits | Best Used For |
|---|---|---|
| Polarizing | Glare reduction color enhancement | Water reflections blue skies |
| ND | Extended exposure times | Moving water cloud trails |
| Graduated ND | Exposure balance | Sunrise sunset scenes |
| UV | Lens protection haze reduction | Mountain landscapes |
| Color | Temperature adjustment | Golden blue hour shots |
Selecting the Right Location for Landscape Photos

Finding the perfect location is crucial for capturing stunning landscape photos that stand out from the crowd. Let’s explore how to discover and prepare for shooting at the most photogenic spots.
Researching Photo Spots
- Browse photography websites like 500px Flickr & Instagram to discover popular landscape photo locations in your target area
- Join local photography groups on social media to get insider tips about hidden gems for landscape photos
- Use apps like PhotoPills & The Photographer’s Ephemeris to track sun positions & plan optimal shooting times
- Check tourism websites & hiking guides to identify scenic viewpoints trails & overlooks
- Review weather patterns & seasonal changes to determine when locations look their best
- Study Google Earth & topographic maps to understand the terrain & find promising vantage points
Scouting Locations in Advance
- Visit potential spots during different times of day to assess lighting conditions & composition options
- Walk around the entire area to find unique perspectives & foreground elements
- Take test shots with your phone to experiment with different compositions
- Mark GPS coordinates of promising shooting locations on your phone
- Note potential hazards like unstable ground steep drops or tide patterns
- Check parking access & required permits for early morning or late evening shoots
- Time the walking distance from parking to shooting locations
- Identify backup shooting spots nearby in case weather conditions change
- Look for distinctive natural features that can serve as focal points
- Consider seasonal changes that might affect the landscape’s appearance
Post-Processing Techniques for Landscape Photos

Transforming raw landscape photos into stunning masterpieces requires skillful post-processing techniques to enhance their natural beauty while maintaining authenticity.
Basic Color Correction and Enhancement
- Adjust white balance to achieve natural-looking colors in your landscape photos matching the scene’s actual lighting conditions.
- Fine-tune exposure levels to recover details in shadows while preserving highlight information.
- Boost vibrance slightly to enhance color saturation without making the landscape photos appear artificial or oversaturated.
- Apply gentle contrast adjustments to add depth and dimension while maintaining a natural look.
- Use HSL (Hue Saturation Luminance) sliders to selectively adjust specific colors like blue skies or green foliage.
- Remove sensor spots or unwanted elements using spot healing tools for clean pristine landscapes.
- Apply subtle clarity to enhance texture in rocks clouds or mountain ranges without creating halos.
Advanced Editing Methods
- Create luminosity masks to target specific brightness zones in landscape photos for precise adjustments.
- Blend multiple exposures using HDR techniques to capture the full dynamic range of challenging scenes.
- Utilize focus stacking to achieve front-to-back sharpness in scenes with close foreground elements.
- Apply selective color grading to create mood and atmosphere while maintaining natural color relationships.
- Use graduated filters to balance bright skies with darker foregrounds digitally.
- Implement dodging and burning techniques to guide viewer attention through the scene.
- Create panoramic stitches from multiple frames to capture expansive vistas in high detail.
- Apply noise reduction selectively to maintain sharpness in well-lit areas while smoothing darker regions.
Common Landscape Photography Mistakes to Avoid

Even experienced photographers can fall into common traps when shooting landscape photos. Let’s explore these pitfalls so you can create more impactful images.
Technical Errors to Watch For
- Setting too high ISO values creates unnecessary noise in landscape photos especially in low-light conditions
- Focusing on the wrong plane leaves key elements of your scene soft or blurry
- Using too fast shutter speeds when capturing moving water or clouds misses opportunities for dreamy effects
- Shooting without a tripod introduces camera shake especially during longer exposures
- Failing to check histogram results in blown-out highlights or crushed shadows
- Not cleaning your lens regularly shows dust spots in clear sky sections
- Shooting only in JPEG limits post-processing flexibility
Composition Pitfalls
- Cluttering the frame with too many elements instead of focusing on a strong focal point
- Placing the horizon line directly in the middle creates static uninteresting landscape photos
- Including distracting elements like trash power lines or unwanted people
- Missing foreground interest leaves landscape photos feeling flat and two-dimensional
- Tilting the horizon line creates an unstable uncomfortable viewing experience
- Shooting only from eye level instead of exploring unique perspectives
- Centering every subject rather than using the rule of thirds for dynamic compositions
- Ignoring the edges of your frame where unwanted elements can creep in
Capturing Different Types of Landscapes
Each type of landscape presents unique challenges and opportunities for creating stunning landscape photos. Here’s how to master different terrains:
Mountain and Forest Photography
Mountains and forests demand specific techniques to capture their grandeur. Use a wide-angle lens to showcase towering peaks while including foreground elements like wildflowers or rocks for scale. In dense forests, look for leading lines created by tree trunks paths or streams. We recommend:
- Shoot during early morning hours when fog adds mystery to forest scenes
- Focus 1/3 into the scene to maintain sharpness from front to back
- Include alpenglow on mountain peaks during sunrise/sunset
- Frame intimate forest scenes using natural archways from branches
- Use polarizing filters to enhance foliage colors and reduce glare
Seascape and Coastal Scenes
Coastal landscape photos require careful timing and technical control. The dynamic nature of water offers endless creative possibilities through long exposures. Key techniques include:
- Time your shots around low and high tides for different compositions
- Use neutral density filters for silky smooth water effects
- Incorporate rock formations or piers as anchor points
- Capture wave motion with shutter speeds between 1/2 to 2 seconds
- Focus on reflections during calm conditions for mirror-like effects
Desert and Arid Landscapes
- Photograph during golden hour when shadows create depth
- Look for patterns in sand dunes and cracked earth
- Include desert plants or rocks as focal points
- Use telephoto lenses to compress distant dunes
- Watch for dust and protect gear in windy conditions
- Capture the contrast between blue skies and golden sand
Seasonal Landscape Photography Tips
Each season presents unique opportunities for capturing breathtaking landscape photos, with distinct colors, lighting, and natural elements that transform familiar scenes into extraordinary images.
Spring and Summer Techniques
- Capture blooming wildflowers in your foreground to add vibrant colors to landscape photos
- Shoot during early morning to avoid harsh midday light and capture morning dew
- Include stormy summer skies as dramatic backdrops for dynamic compositions
- Use polarizing filters to enhance blue skies and reduce glare from wet foliage
- Focus on flowing water features like streams and waterfalls at their peak flow
- Incorporate golden sunrises over meadows filled with fresh growth
- Plan shots around seasonal phenomena like morning mist over lakes
- Frame compositions with fresh green canopies in forested landscapes
Fall and Winter Approaches
- Seek out colorful fall foliage as striking focal points in landscape photos
- Shoot during snowfall to capture pristine winter wonderland scenes
- Use faster shutter speeds to freeze falling snow in winter landscapes
- Focus on patterns created by bare tree branches against moody skies
- Capture frost-covered vegetation during early winter mornings
- Utilize the low winter sun angle to create long dramatic shadows
- Include footprints or tracks in snow for added visual interest
- Take advantage of extended golden hours during winter months
- Frame autumn reflections in still lakes and ponds
- Look for ice formations along water features as unique compositional elements
Taking Your Landscape Photos to the Next Level
We’re thrilled to see you embark on this incredible journey into landscape photography! The beauty of this art form lies in its endless possibilities for creativity and growth. With the techniques and tips we’ve shared you’ll be well-equipped to capture nature’s magnificent displays.
Remember that developing your unique style takes time and practice. Don’t be afraid to experiment with different approaches and push your creative boundaries! Every sunrise every stormy sky and every misty morning presents a new opportunity to create something extraordinary.
We can’t wait to see the stunning landscapes you’ll capture as you apply these techniques and make them your own. Now grab your camera head outdoors and start creating those breathtaking shots that tell your unique story of the natural world!